Options
Everything Handler.load() accepts: the measure strategy, the event callback, the eleven-colour palette, the screens, and the texts.
New integrations should use Saphere Scan v2. What follows documents the v1 options object.
Your options are validated, then merged over the defaults — and over any customisation applied by ?customizationId=. Unknown top-level keys are rejected rather than ignored.
Top level
| Key | Type | Default | Notes |
|---|---|---|---|
createMeasure | object | — | Required. How a measure is obtained. |
onEvent | function | — | Called on every event. |
allowLeave | boolean | false | Shows a control letting the user quit the widget. |
allowSkip | boolean | false | Lets the user skip onboarding screens. |
lang | string | browser language, else "en" | One of the ten supported languages. |
useShadow | boolean | true | Mounts inside a shadow root. |
desiredVariables | string[] | — | Narrows what is computed. |
tags | string[] | — | Stored with the measure. |
Screens and colours are not in this list. They are prepared in the console, not written in your code — see appearance below.
`useShadow: false` lets your CSS reach inside
The default mounts the widget in a shadow root, which stops your stylesheet from affecting it and its own from affecting you. Turning that off is occasionally necessary in hybrid shells; when you do, expect your global CSS to reach the widget’s internals.createMeasure
The widget needs a measure to attach the capture to. There are two strategies, and they differ in who makes the call.
delegate — the widget calls your endpoint
createMeasure: {
    strategy: "delegate",
    url: "/api/saphere-measure",
    headers: { "X-Session": sessionId }   // optional
}
The widget issues POST <url> with a JSON body carrying userData, desiredVariables and tags, and expects { "id": "<measureId>" } back.
Your endpoint authenticates your user, calls POST /measures on the Saphere API with your key, and relays the identifier.
handle — your code makes the call
createMeasure: {
    strategy: "handle",
    fetch: async ({ userData, desiredVariables }) => {
        const response = await fetch("/api/saphere-measure", {
            method: "POST",
            headers: { "Content-Type": "application/json" },
            body: JSON.stringify({ userData, desiredVariables })
        })
        return await response.json()      // must be { id: "…" }
    }
}
`fetch` must resolve to an object with an `id`
Returning the identifier as a bare string throws Cannot get measureId!. The contract is { id: string } — an object.
This is worth checking first when a v1 integration fails at the very start: some published examples returned json["token"], which is a string, and does not satisfy it.
If the endpoint answers with a non-2xx status, the widget throws Cannot create measure!.
onEvent
onEvent: async event => {
    console.log(event.type, event)
}
Called for every event below. The return value is meaningful: returning literally false cancels the transition the event announces. Anything else allows it, including undefined, and including an exception thrown by your own code, which is logged and ignored.
The handler is awaited.
A slow handler slows the widget
Because the return value can veto a transition, v1 waits for your handler before proceeding. A handler that performs a network call on every event delays the user journey by that call.
This is the behaviour v2 deliberately dropped: there, onEvent is never awaited, and vetoing moved to a separate hooks API with a bounded timeout.
The event union
type | Payload | When |
|---|---|---|
video-stream-loading | { status: "start" } | The camera is being requested |
video-stream-loading | { status: "ready" } | The stream is open |
video-stream-loading | { status: "error", reason } | The camera was refused |
start | — | The face is accepted and framing is frozen |
record | — | Capture begins |
end | — | All frames are buffered and the end marker is queued |
result | { id, userData?, variables } | The measurement completed |
aborted | { reasons } | The measurement stopped |
leave | — | The user asked to quit (requires allowLeave) |
transition | { from, to } | Declared, but never emitted |
video-stream-loading reason is one of "denied", "no-device", "not-supported", "already-used".
aborted reasons carries either a conformity code (CONFORMITY_POOR_LIGHT, CONFORMITY_MUCH_VARIATIONS, CONFORMITY_FACE_PRESENCE, CONFORMITY_LOW_FPS, CREDIT_EXCEEDED, MISSING_USER_DATA_*, …) or a failure reason (WIDGET_RESIZED, FOCUS_LOST, CANCELED_WHILE_CAPTURING, CREATE_MEASURE_ERROR, WS_CONNECTION_ERROR, VIDEO_SOURCE_ENDED, …).
`transition` never fires
TransitionEvent is part of the declared type, and a handler branching on it will compile. Nothing in the module constructs one. Do not build navigation tracking on it.In a result event, each variable is { value, signals, error: null } on success, or { value: null, error } on failure.
Appearance: screens and colours
The widget’s appearance is not described in the options you pass in your code. It is prepared in the ops console, in the customisation workshop, and attached to the widget by its identifier.
Each customisation is listed under Scan tools → Scan customization, with the identifier you will use.
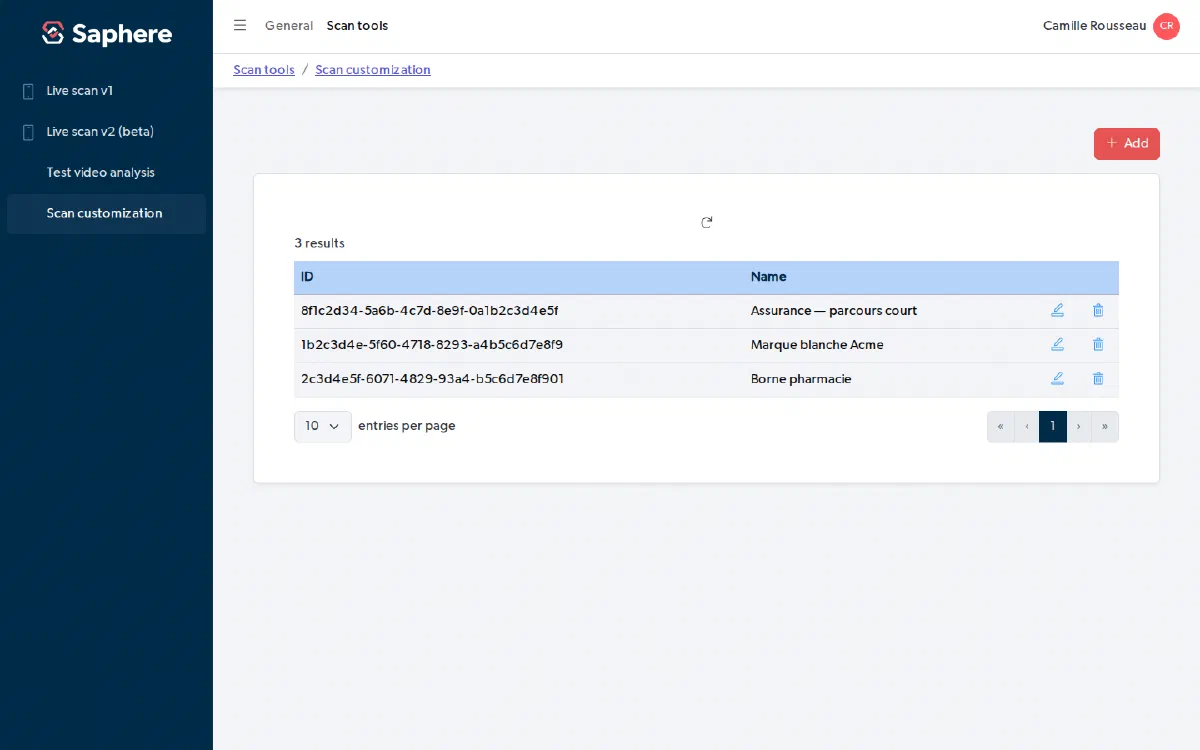
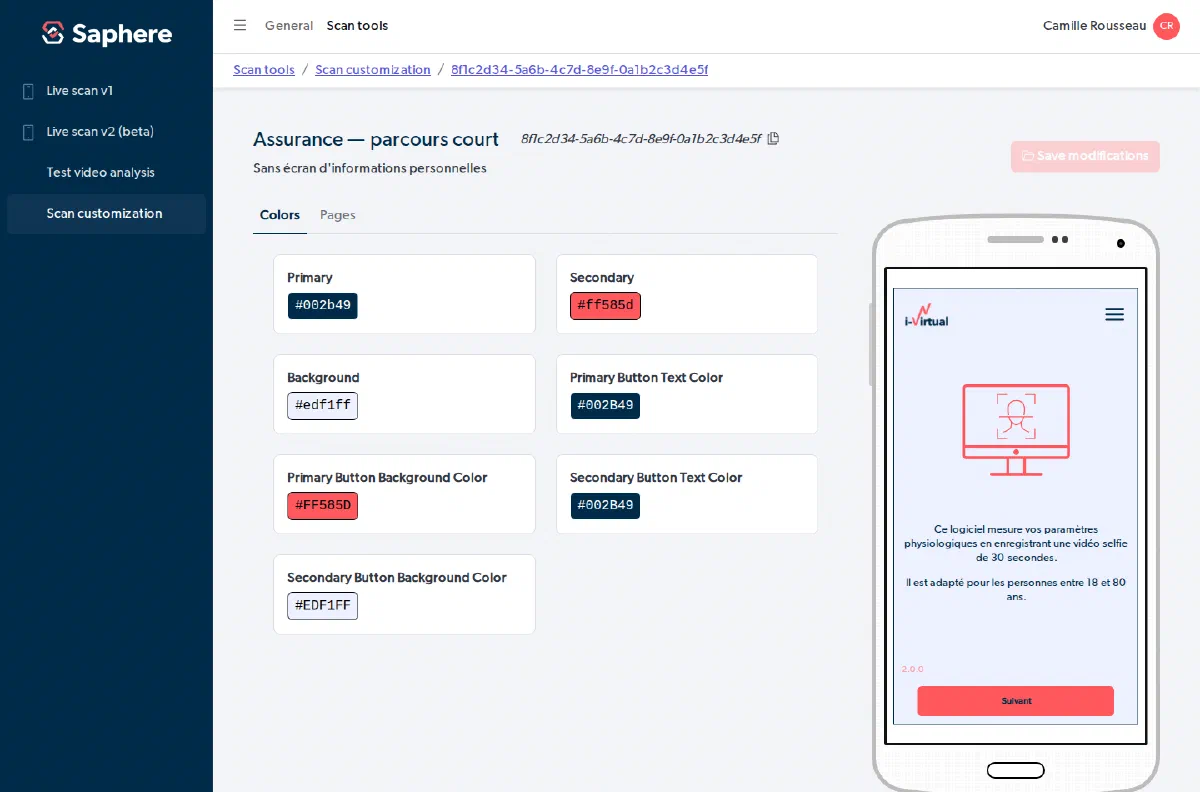
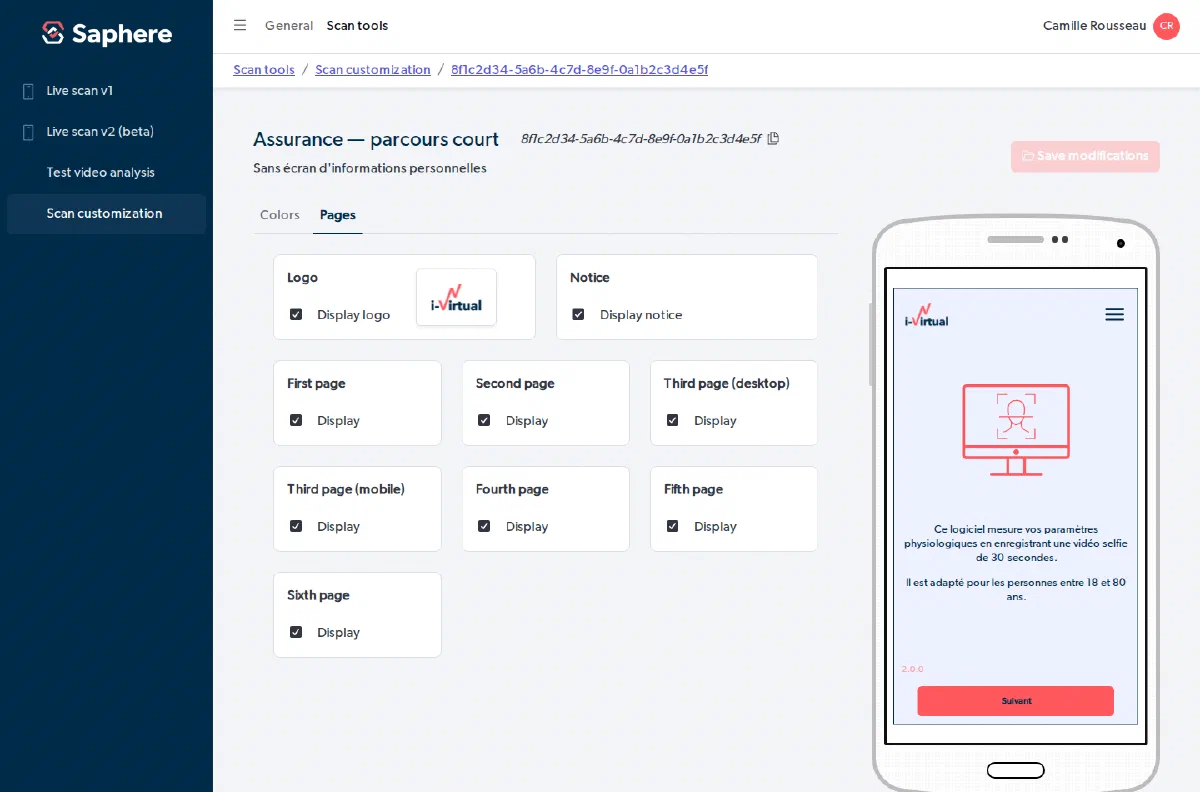
Opening one gives the workshop. A live widget sits beside the settings, so what you approve is what your users will see.
Colours — the palette the widget applies to itself.
Pages — which screens the journey includes, and which are left out, plus the logo shown at the top.
Once the customisation is saved, add its identifier to the address you load the module from:
<script src="https://cdn.saphere.ai/saphere-scan/v1/js/main.min.js?customizationId=8f1c2d34-5a6b-4c7d-8e9f-0a1b2c3d4e5f"></script>
The module arrives already carrying it. Nothing changes in your code, and editing the customisation later takes effect at the next load, with no deployment on your side.
Prepare it in the same environment you load from
A customisation saved on Test is not the same record as one saved on Production, so its identifier does not carry across. Prepare it where you will use it.